I can’t get my image to fit! What now?
I bet you there isn’t one of you that hasn’t run into the need of resizing an image. Be it for your brochure or your personal photo album, the need for getting the size of an image just right comes up a lot. With GIMP, you can do it easily and for FREE. Don’t know what GIMP is? Take a look at our digital product review of GIMP 2.8 GNU Image Manipulation Editor.
STEP ONE:
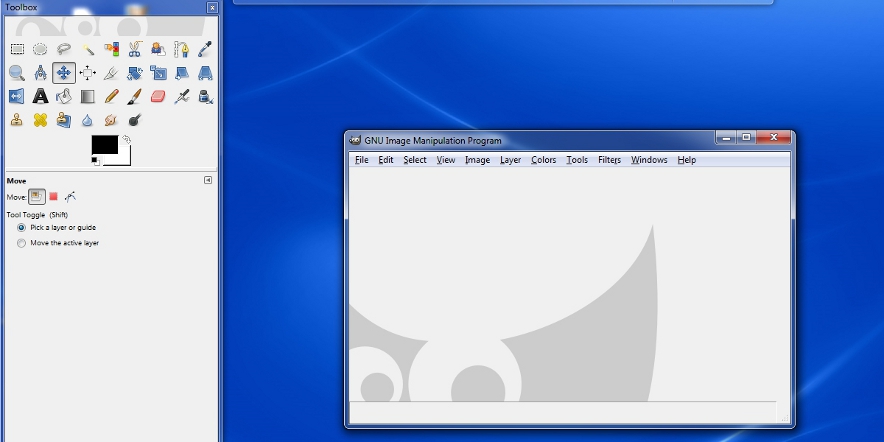
After you’ve found and downloaded GIMP 2.8 (or latest version at time of reading), you need to open the program. Depending on what version you are using it will look like this when you have successfully open the program:
STEP TWO:
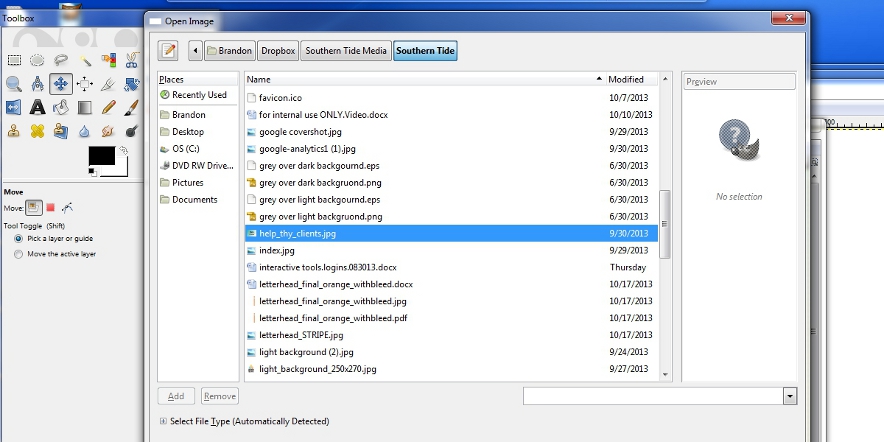
Step two is engage the drop down menu under FILE and click on OPEN. OPEN will then give you a pretty common file browser for you to find the image file you wish to resize. Find it, select it, and open it.
STEP THREE:
As you can see in my example, I have chosen my Help Thy Client header file used on many of the articles found in this blog series.
STEP FOUR:
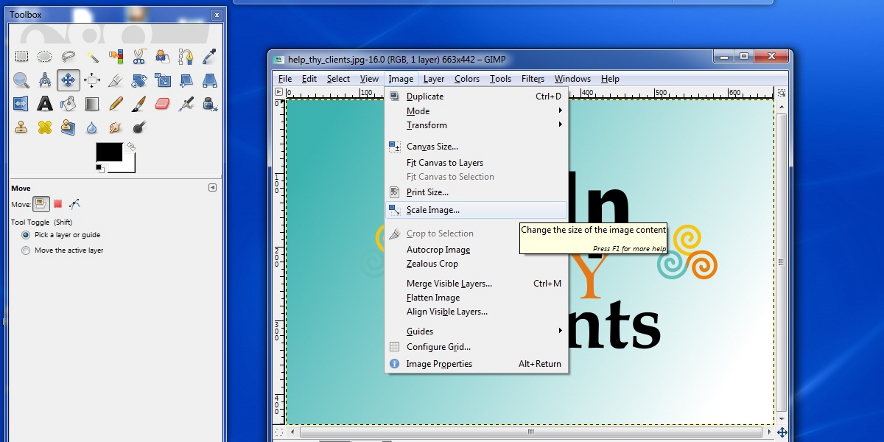
Once the file is open (SEE ABOVE), you will want to engage the IMAGE drop down and select SCALE IMAGE. Now scaling and resizing are not the same thing. Scaling means you are resizing on a SET width and height. So if you change one (bigger or smaller) than the other dimension will SCALE to keep the same aspect ratio. Resizing implies you need to get the image file to fit in a predetermined size (width and height…not resolution or file SIZE) regardless of the given ratio of the image file you are editing. More on that in the next step…
STEP FIVE:
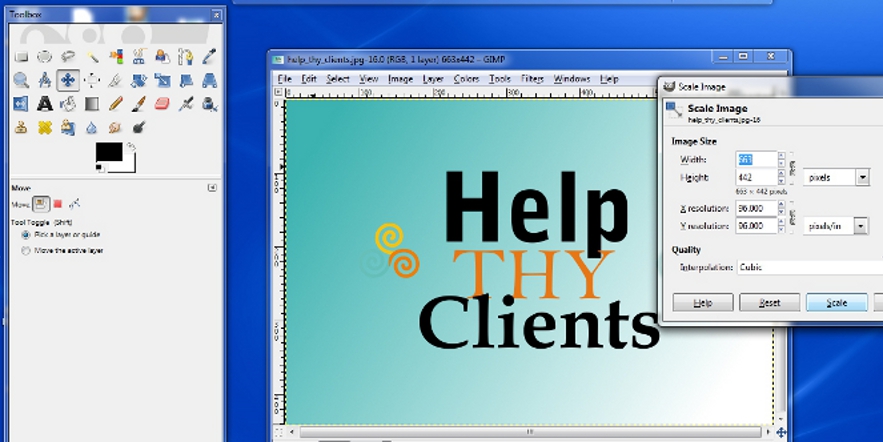
In this final step, you will see the “Scale Image” pop up window displayed in the screen capture below. You will see the W and H is displayed in that window in PIXELS (given as 663 x 442). A couple of helpful things you can do from this Scale Image window. You can discover the size of any image you may need to know the size of. You can get PIXELS by default, but you can change that to inches, millimeters, percent and more. (Inches say for photographs for example that need to be printed and set into a standard frame size). Now between the Width and Height aspects and the PIXELS you will see vertical chain icon. By default, that chain link is UNBROKEN, which mean you can’t change the aspect ration (the SCALE) of the image. This means if you change the width the height will automatically update to keep the dimensions the same. If you want to “break” that you simply click on the link icon. The link icon will appear to “break” and you can now change the width dimension without the height dimension automatically changing (and vice versa).
And here is where the real lesson in image scaling and resizing comes into play. By “breaking” the dimensions, you can distort the image file (making it looked stretched or squat for example).
Final Lesson
What if you want to resize an image file on a different dimensional aspect, but you can’t live with distortion (most uses of images are for the expressed purpose of people LOOKING at them…and who wants to look at a distorted image?). So what do you do?
Open the original file you wish to resize. (see STEP ONE). Then under the same drop down file menu that you found OPEN under, choose NEW. New will allow you to pick the dimensional aspects of your file right from the start, and by default the dimensions are not “locked” together as explained above. Now you should have one file open and one NEW file window open. If you are lucking, you should be able to copy the open image file and the paste it into the new file window. You can move the image around to get the best fit, then SAVE FILE. Voila, if you are lucky then you image resizing project is complete. Most of the time you won’t be so lucky.
One Final Lesson
Okay, less say you original file is not “tall” (height dimension) enough to simply cut and paste into the size you want it to be in. You can’t leave a blank spot. Or, less say your original image file is really big (width and height) and it fills up the “new file size” but it leaves out a lot of the image (like forced cropping). Now what? Phew…well hold on to your horses. This sounds more complicated than it really is.
Open your original file format and SCALE it (on the lacking dimension) so it will correctly fit into your “new file size”. To Scale an Image with GIMP simply follow the instructions above (remember by default the resizing process is SCALING and NOT resizing). So let’s say your new width needs to by 600 pixels wide. Scale your original file on that dimension and let the height scale with it. Then copy and paste it into your New File window and save it. This will prevent all distortion and most (not all mind you) of the forced cropping. When resizing an image file, there is always going to be some kind of sacrifice with losing some of the picture due to size cropping. Unless of course the scale or aspect ratio are exactly the same proportion.


